[Windows 7]HOWTO:重装系统后导入之前的 Windows Virtual PC 虚拟机

![]() 导入已经存在的 Windows Virtual PC 虚拟机
导入已经存在的 Windows Virtual PC 虚拟机
系统使用时间长了不免要重新安装操作系统,gOxiA 最近升级了笔记本硬盘到500G,虽然迁移系统到新硬盘但是发现还是存在一些问题,此外Office 2010 RTM也已经发布,最终选择了重新安装系统。因为之前在 Windows Virtual PC 上安装了 Windows XP Mode 以及其他虚拟机,而 Windows Virtual PC 并未提供导出功能,在重新装完系统之后要恢复 Windows XP Mode 和其他虚拟机变得有些麻烦,如果重新安装 Windows XP Mode 和其下的应用软件,简直就是恶梦!经过实践发现其实是 gOxiA 想复杂了,导入已经存在的 Windows Virtual PC 虚拟机非常简单。
首先,访问微软网站下载 Windows Virtual PC 以及 Windows XP Mode,并依次进行安装。之后通过开始菜单打开 Windows Virtual PC 程序目录,同时打开你的虚拟机存储所在目录。
OK,完成上述操作后在虚拟机存储目录找到虚拟机配置文件“.vmcx”选中它后,鼠标左键单击并将其拖动到 Virtual Machines 中即可。如下图所示:
需要注意的是配置文件必须是 .vmcx否则无效哦!所以在重新做系统前请务必将 Virtual PC 目录中的 vmcx 文件拷贝到其他备份位置。
[Windows 7] 微软宣布 Windows Virtual PC & XP Mode 不再需要硬件虚拟化技术
![]() 微软宣布 Windows Virtual PC & XP Mode 不再需要硬件虚拟化技术
微软宣布 Windows Virtual PC & XP Mode 不再需要硬件虚拟化技术
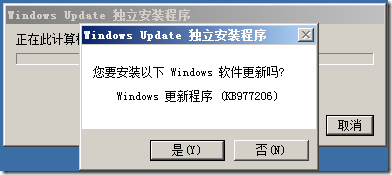
如果长期关注 gOxiA 的 Blog,相信一定知道 Windows Virtual PC & XP Mode,但是首先我们还是先来回顾一下该技术的功能和特性《Windows Virtual PC & XP Mode 面向应用兼容性问题的终极武器》。其中 Windows XP Mode 的实现,就是通过微软的 Virtual PC 虚拟化技术并结合处理器的硬件虚拟化功能(Intel VT/AMD-V)。由于 Windows 7 的硬件需求并不高,所以目前大部分 PC 都能很好的运行它。但是,如果企业或个人部署了 Windows 7 并迫切需要 XP Mode 来解决兼容性问题,而当前硬件却无法满足硬件虚拟化需求,那么势必对 Windows 7 在企业中的普及造成了阻碍。所以 gOxiA 认为也就是出于这个原因,微软最终发布了不再需要硬件虚拟化技术支持的补丁程序 - KB977206。
如果你还未安装过 Windows Virtual PC & XP Mode,可以参考 gOxiA 之前的日志:《Windows Virtual PC & Windows XP Mode 安装图览》、《使用 Windows Virtual PC 创建一个虚拟机》。
如果要安装这个补丁必须先安装 Windows Virtual PC,否则会提示该补丁不适用当前的系统。要安装 Windows Virtual PC 可以从微软官方网站进行下载,地址是:http://www.microsoft.com/china/windows/virtual-pc/download.aspx,在该网址中还能同时下载到 XP Mode。
在安装完 Windows Virtual PC 之后就可以安装 KB977206 这个补丁,该补丁的下载地址是:
32-bit:http://www.microsoft.com/downloads/details.aspx?FamilyID=837f12aa-1d37-464e-ae59-20c9ecbebaf6
64-bit:http://www.microsoft.com/downloads/details.aspx?FamilyID=e70dd043-e262-43c0-a002-446567f1e2b4
注意,下载该补丁需要进行正版验证!安装过程很简单就像普通的补丁安装一样,在安装后请根据提示重新启动计算机。
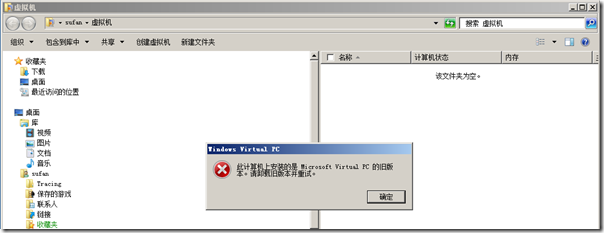
如果出现下图的错误提示,请卸载你当前 PC 上安装的 Microsoft Virtual PC 2007 SP1。
最后我们就可以在没有硬件虚拟化技术支持的 PC 上使用 Windows Virtual PC & XP Mode!如果 PC 已经拥有硬件虚拟化技术支持,则无需安装此更新补丁,除了有助于性能的提升,没准微软在未来会继续发布能够运行 64-bit guest OS 的补丁!
不论怎样!相信微软的这一举措,将加快企业部署 Windows 7 的进程,更加推动 Windows 7 系统的普及率!这一步微软走的十分到位!
在 Windows Virtual PC 上使用 Windows Server 2008 Core
![]() 在 Windows Virtual PC 上使用 Windows Server 2008 Core
在 Windows Virtual PC 上使用 Windows Server 2008 Core
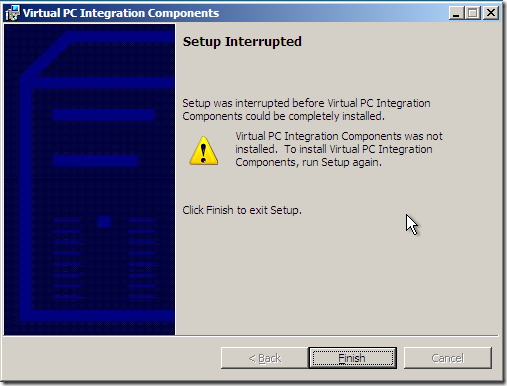
Virtual PC Guy's Blog 发布了一篇日志与大家分享如何在 Windows Virtual PC 上使用 Windows Server 2008 Core,gOxiA 看完感觉还是有一定价值的,特总结一下在本 Blog 与大家分享。在 Windows 7 上我们目前主要使用 Windows Virtual PC 作为虚拟机平台,虽然相比 Microsoft Virtual PC 2007 有了诸多的改进和增强,但是显然也存在一些不足,缺乏虚拟机平台的通用性,可能是跟 Windows 7 集成度太高而给人的一种错觉!不过也不难理解,毕竟叫 Windows Virtual PC 嘛!回到正题,在 Windows Virtual PC 上创建一个虚拟机,然后安装 Windows Server 2008 Core 版本,为了能够轻松地在窗体之间切换和使用增强功能,我们需要为虚拟机安装 Integration Components,但是你会发现安装会失败并提示下图中显示的警告!
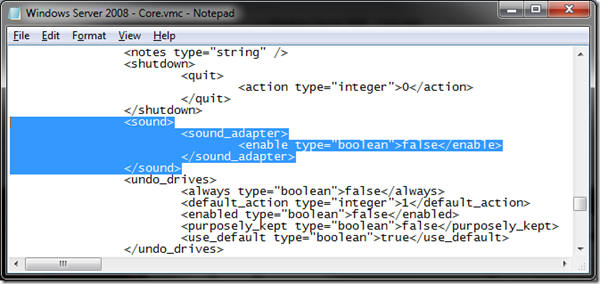
出现该故障的主要原因就是因为 Windows Virtual PC 创建的虚拟机中包含声卡设备,所以根据《Using Windows Server 2008 Core on Windows Virtual PC》文中的提示,我们只需要修改虚拟机的配置文件 – VirtualMachineName.vmc,找到 Sound 段落,将其 “enable type=”boolean””的设置由 True 改为 False ,最后重新打开虚拟机安装 Integration Components 即可!
虽然大家都已经开始在学习 Windows Server 2008 R2,而 Windows Virtual PC 不支持 64bit guest OS,所以该文的价值并没有想象中那么大,可是起码能够引导我们重视这些配置文件,也许在深入发掘之后有其他更大的收获!


