Windows Virtual PC & Windows XP Mode RTM 向 MSDN & TechNet 订阅者发布
![]() Windows Virtual PC RTM & Windows XP Mode RTM 向 MSDN & TechNet 订阅者发布
Windows Virtual PC RTM & Windows XP Mode RTM 向 MSDN & TechNet 订阅者发布
有关 Windows Virtual PC 的介绍可以参考我之前发布的几篇日志:《Windows Virtual PC & XP Mode 面向应用兼容性问题的终极武器》、《Windows Virtual PC & Windows XP Mode 安装图览》和《Windows Virtual PC 功能概述》,如果你是 MSDN 或 TechNet 的订阅者,那么现在就可以访问订阅网站下载到 Windows Virtual PC 和 Windows XP Mode 的 RTM 版本。
Windows Virtual PC is the latest Microsoft virtualization technology that allows you to run many productivity applications on a virtual Windows environment, with a single click, directly from a Windows 7-based PC.
Note:
- Install Windows XP Mode to create a virtual Windows XP SP3 environment.
- Windows Virtual PC requires Windows 7 RTM.
- Before installing the RTM version ensure that you have uninstalled the older version of both Windows Virtual PC and Windows XP Mode and restarted the system.
- Windows Virtual PC requires processor capable of hardware virtualization, with AMD-V™ or Intel® VT turned on in the BIOS.
For more information about Windows Virtual PC, please visit the Windows Virtual PC website.
Windows Virtual PC supports the following 32 bit Guest Operating systems : Windows XP Service Pack 3 (SP3) Professional, Windows Vista Enterprise Service Pack 1 (SP1), Windows Vista Ultimate Service Pack 1 (SP1), Windows 7 Professional, Windows 7 Ultimate, Windows 7 Enterprise.
System Requirements
· Supported Operating Systems: Windows 7 Home Basic, Windows 7 Home Premium, Windows 7 Professional, Windows 7 Ultimate, and Windows 7 Enterprise.
Note: Windows Virtual PC requires Windows 7 RTM.
· Processor: Processor capable of hardware virtualization, with AMD-V™ or Intel® VT turned on in the BIOS. Pls refer to OEM
· Memory: 2GB of memory recommended.
· Hard disk requirement: 20MB hard disk space for installing Windows Virtual PC. Additional 15GB of hard disk space per virtual Windows environment recommended.
Installation instruction: Based on the architecture (32-bit or 64-bit) of your computer, download the appropriate update package (Windows Virtual PC). Double click on the update package and follow the instructions. Reboot your system to complete installation.
Windows Sysinternals 发布 Disk2vhd v1.0
 Disk2VHD v1.0
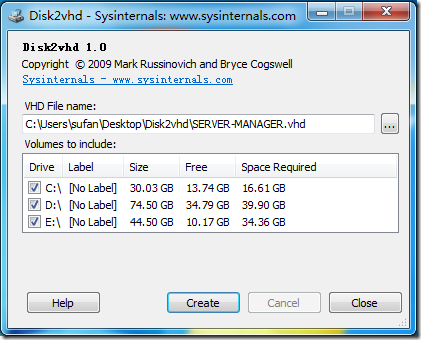
Windows Sysinternals 又为我们带来了一个新工具 — disk2vhd,一款用于将逻辑磁盘转换为 vhd 格式虚拟磁盘的实用工具。利用该工具我们可以轻松地将当前系统中的分区生成为一个 vhd 文件,便于挂载到虚拟平台中。
disk2vhd 能够运行在 Windows XP SP2,Windows Server 2003 SP1 或更高版本的系统之上,并且支持 64位系统。但是需要注意的是受虚拟化平台产品对 VHD 的限制,比如 Microsoft Virtual PC 仅支持最大 127G 的虚拟磁盘(VHD),那么你所转换的 VHD 则不能高于这个限制。
有关 disk2vhd 的详细介绍及下载可以访问:http://technet.microsoft.com/en-us/sysinternals/ee656415.aspx
[Windows 7] HOWTO:在 Windows 7 上创建一个标准用户
 HOWTO:在 Windows 7 上创建一个标准用户
为了方便普通用户使用,决定通过 Blog 发表此篇日志。旨在帮助那些正在或打算使用 Windows 7 的家庭电脑用户,能够方便快捷的通过网络搜索,并参考此篇日志完成标准用户的创建。
在 Windows 中,标准用户即一个隶属于“Users”组,拥有普通(受限)权限的用户账号,该账号能够运行大部分系统上的应用程序(PS:只要该程序完全遵循 Windows 要求来编写。),并能够执行有限的系统配置。对于家庭环境,标准账号通常被分配给家里的孩子或常来家中的亲戚朋友!
那么该如何正确快捷地创建一个标准用户呢?!下来 gOxiA 将引领大家完成这一步骤:
首先,单击左下角的“![]() ”图标,或按下键盘上的“
”图标,或按下键盘上的“![]() ”键,来激活 Windows 开始菜单。随后点击“控制面板”。在“控制面板”中点击“添加或删除用户账户”。
”键,来激活 Windows 开始菜单。随后点击“控制面板”。在“控制面板”中点击“添加或删除用户账户”。
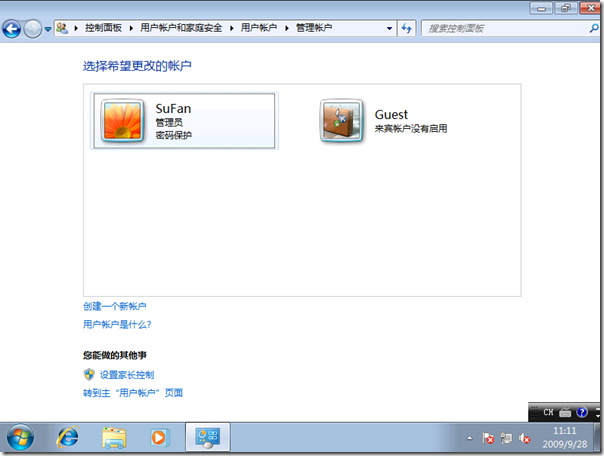
在“管理账户”面板中单击“创建一个新帐户”。
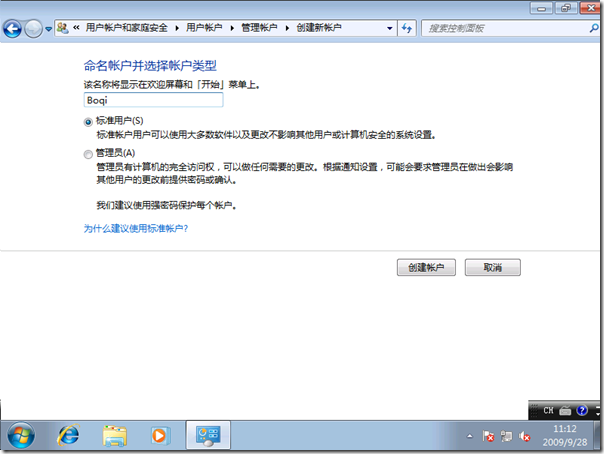
在“创建新帐户”面板中输入我们的新账户名称,而账户类型则选择“标准用户”(这里就是本文的关键所在!),然后单击“创建帐户”。
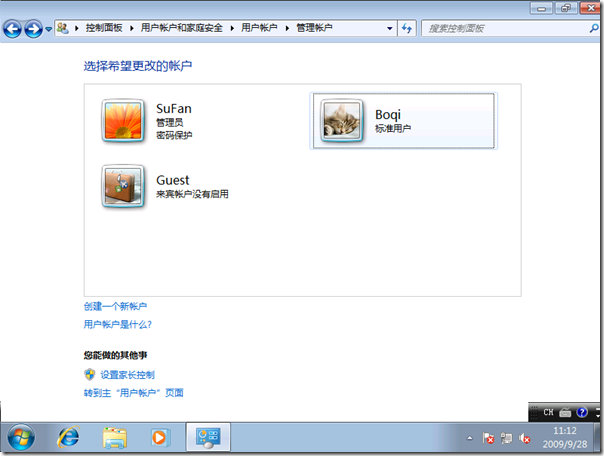
现在我们就能够在“管理账户”面板中看到之前新添加的标准用户。
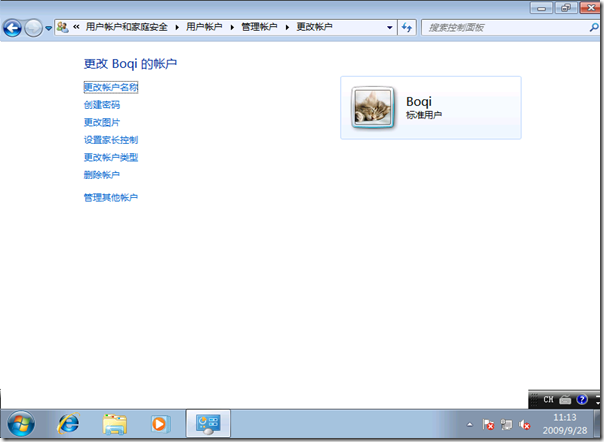
因为账号的命名规则要求必须输入英文字母或数字,而作为中文用户可能更希望看到的是一个中文显示,那么我们可以单击面中中的用户名称,进入“更改帐户”面板。在这里,我们可以通过“更改帐户名称”来为该账号命名一个友好的显示名称,OK!?只是用来显示,当涉及到身份验证时还是需要使用之前的英文字母或数字等规则组合的命名名称。此外,我们还可以为该账户创建密码、更改标示图片、设置家长控制,更改帐户类型以及删除帐户。
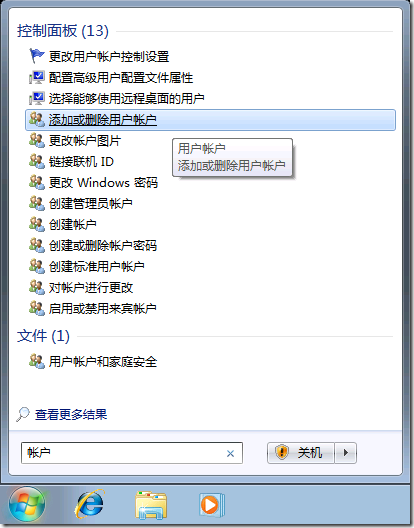
如果你认为进入到帐户管理的步骤还太过繁琐,那么可以在开始菜单中的“搜索程序和文件”框中输入“账户”,那么系统会自动搜索有关的程序及文件。使用起来非常方便!


